I
make and sell sling rings. If you know how to sew, you can easily make a ring sling yourself. Here is how I make mine. Feel free to use the instructions for your own personal use, but be considerate and don't use my design--which I have developed over the past few years--if you want to make slings to sell.
Materials:
- slightly over 2 yards of woven, non-stretchy fabric (2 yards 4" for most people, 2 1/3 yards if you're big-chested). I prefer linen-cotton blends. You will see the back side on the "tail" of the sling, so choose something that looks good on both front and back. Embroidered fabrics work very well.
- 2 aluminum sling rings. I use the largest size (3") for medium to heavy weight fabrics. For very thin, lightweight fabrics, I recommend the medium size (2.5").
- thread
- masking tape
- disappearing fabric marker or dressmaker’s chalk
Instructions:
1. If desired, wash and dry fabric before sewing sling.
2. Cut a length of fabric 26-30” wide. Square off the ends.
3. Hem the two long ends and one short end. (I turn 1/4” and press, turn 3/8” and press, then stitch.)
4. Lay the fabric out right side up, with the raw edge on the right side. Make two parallel sets of marks—one at the raw edge, the other 9” from the raw edge--starting from the bottom hemmed edge. The first mark starts at 2”, and the rest are every 3” after that. (So 2, 5, 8, 11, 14, 17, 20...)

5. Fold and press along each parallel line (pressing the wrong sides together).

6. Make the pleats: fold the first pressed edge down until it lines up with the edge of the fabric. Press.

7. Fold the next pressed edge down until it lines up with the underside of the pleat (you can feel it by running your fingers over the fabric). Press.

8. Continue until all of the pleats are pressed into place. The last pleat may need a bit of adjusting to make it line up just right with the finished edge. You can see me doing this in the photo.

9. Temporarily anchor the pleats with masking tape. Put one length about 5/8” from the raw edge, and another length of tape 8” from the raw edge. Flip over and tape on the back side.

10. Zig-zag stitch the raw edge. Trim if necessary.

11. Mark a line 4” from the raw edge with a disappearing fabric marker.

12. Using masking tape, fold the pleats close together so they overlap only ¼”. Tape on the front.

13. Flip over and tape the back of the pleats, arranging the pleats to make them look nice (if you're a perfectionist like me; you won't ever see them).

14. Stitch two parallel lines, 1/8” apart, to hold the pleats in place. This holds the pleats neatly in place when the sling is washed.

15. Remove the center masking tape. Put the two sling rings onto the pleated edge. Fold over and line up with the masking tape. (Be sure to that the "wrong" sides are folded together, not the "right" sides!) Stitch two parallel lines through all layers, 1/2” apart.

16. Add a third line of decorative stitching between the first two lines. Here are some photos of the stitching from various slings I've made.


Remove all masking tape and enjoy!


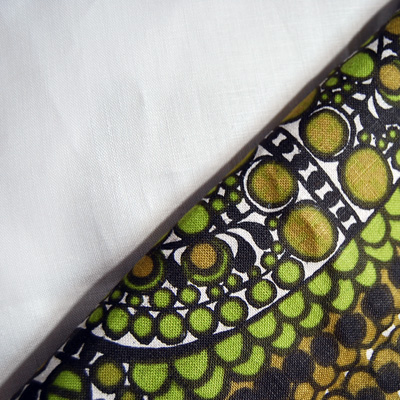
 The end result has a decorative panel (also functions as a pocket) of the vintage print on the tail.
  By the way, I'm open again for business at Second Womb Slings. I have lots of gorgeous new linens and silks, and more batiks to be added for my infant scale slings.